 English
 Русский
 Español
How it is calculated
How to calculate a rectangle-to-rectangle transition flat pattern
The transition is made of four flat trapezoid walls, so you can work it out and draw it without software — Pythagoras and a pocket calculator are enough. Let’s take the simplest case, a square transition with the top centered: bottom 400 × 400 mm, top 200 × 200 mm, height 250 mm. If the sides differ or the top is offset, the method is the same — you just repeat it for each wall.
What the transition is made of
A transition has four walls. Each joins a bottom edge to the parallel top edge, so it is a flat trapezoid that lays out on the sheet exactly, with no approximation.
On a square transition all four walls are the same: bottom edge 400 mm, top edge 200 mm. All that is left is the wall height and the shift where the top edge starts — then the trapezoid can be drawn.
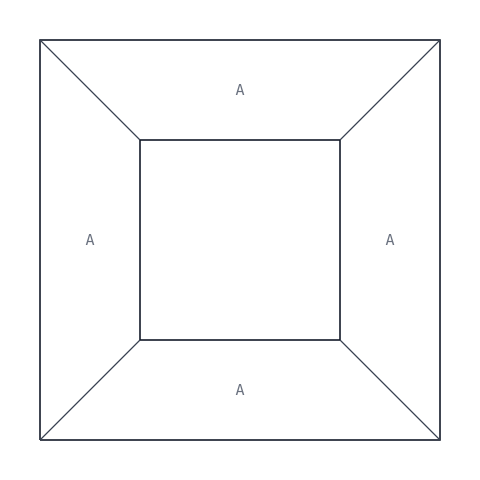
The wall’s run
Look at the transition from above: the top edge of each wall sits in from the bottom edge. That distance is the wall’s run. With the top centered, the size difference splits equally between the two sides:
run = (400 − 200) ÷ 2 = 100 mm.
The top edge is shifted along the bottom edge by the same amount — that is where it starts on the pattern.
Wall height — by Pythagoras
A wall leans, so it is taller than the transition itself. The run and the transition height are the legs of a right triangle and the wall height is its hypotenuse:
wall height = √(250² + 100²) = √72,500 ≈ 269.3 mm.
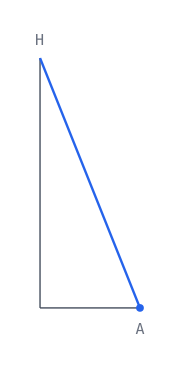
Wall angle and height from an angle
The slope of the wall from horizontal: angle = arctan(250 ÷ 100) ≈ 68.2°. 90° is a vertical wall.
Sometimes it is the other way round: the angle is given and the height is needed. That is how hoppers are designed — for bulk material to flow by itself the wall is kept at 60° or steeper, steeper still for damp or sticky material. Then height = run × tan(angle) = 100 × tan 60° ≈ 173.2 mm.
Laying out a wall and checking the diagonal
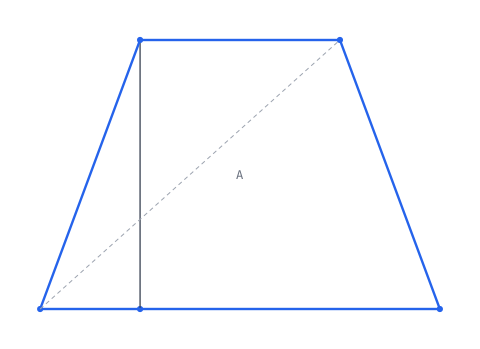
Draw the bottom edge, 400 mm. From its left end measure 100 mm and square up a perpendicular 269.3 mm high. From its top draw the 200 mm top edge parallel to the bottom and join the ends — the wall is done. You need four of them.
Check the diagonal from bottom left to top right: √((100 + 200)² + 269.3²) ≈ 403.1 mm. If it matches, the wall is right.
If the sides differ or the top is offset
Nothing changes in the method — you simply repeat it for each wall with its own numbers. On a rectangular transition the walls along the width and along the length have different edges and runs, so you get two pairs of different trapezoids.
With an offset top, opposite walls have different runs too: one is steeper, the other flatter, and all four are worked out separately. The run and shift of each wall are easiest to take from a full-size plan view. If one side is flat, its run is zero: the wall is vertical and its height equals the transition height.
Metal thickness and seam allowance
For thin sheet the thickness can be ignored. Thick plate bends about its middle line, so the pattern is developed on it: if the sizes were measured outside, reduce each opening size by the thickness; if inside, add it.
A seam allowance goes on the side edges of the walls — on one side of every wall, or on both sides of two opposite walls so the other two are cut without one. Either way each corner seam gets exactly one lap.